The steps to seal your driveway should assist you.
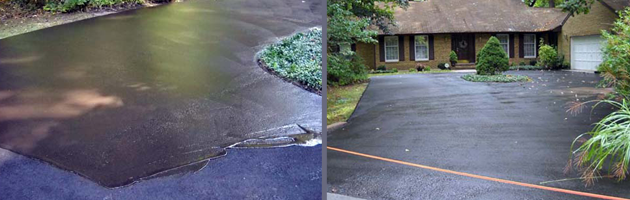
The summer sun may be harsh on many things — your skin, your car, your wallet — but one of the last things you may consider is your driveway. The beating sun and humidity wreaks havoc on the driveway, causing it to crack and peel, and with the added weight of cars driving or parking on it, your driveway needs some tender loving care. Short of replacing your whole driveway, the best way to treat it in the summer is to seal your driveway.
 If you seal in the summer, covering your driveway also helps protect it during the winter months from ice and snow and salt. Contractors can do it for you, but for those people who like to tackle DIY projects themselves, it’s pretty simple and cheap to do it yourself. Have the right tools on hand to make this an easy job, but also make sure to follow these steps and tips when protecting your driveway.
Sealer for your driveway should only be applied during the hot summer months when it is not expected to rain for at least 36 hours (July and August are the perfect months). Make sure that on the day you are applying, the temperature will be above 60 degrees Fahrenheit. Before working, put on old clothes and tie up feet with plastic bags to protect shoes.
 Barricade the end of the driveway to prevent cars and other traffic from using the surface while drying. You can do so with two cinder blocks and a 2×4 through them or dowel rods staked in the ground on each side of the driveway and a rope/ribbon tied to each rod. Make sure dowel rods are securely in the ground.
- Do preventative maintenance – Repair cracks and holes in driveway. Start by removing any foreign material in cracks or potholes with a stiff brush and/or screw driver. Fill large cracks with crack filler, overfilling slightly to allow for shrinkage. For deeper cracks, fill with sand to 1/4 inch below the surface, then use crack filler. On potholes, dig out loose material and make sure the edges around the hole are solid, not loose. Pour pothole patch into the opening, overfilling slightly to allow for compacting. Tamp until patch extends slightly above surface. Wait two days after repairs to seal driveway.
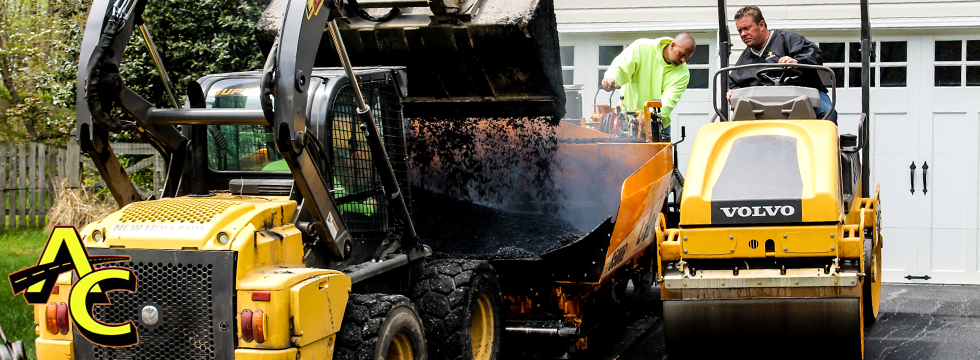
- Prep and clean area – Sweep driveway thoroughly with a stiff broom before opening the package of sealant. Scrub oil stains with a degreaser and brush. Clean the driveway with a hose or pressure washer.
- Pour and spread sealant – Once the driveway is dry after washing, start at the top of the driveway and pour a thin row of sealant. Use a stiff brush/broom to massage the sealant into the driveway. Next, use a squeegee or applicator to spread excess sealant. Once dry, apply a second coat and let dry thoroughly for 24 hours.
Resurfacing every 2-3 years will protect your driveway from harsh weather and will keep it looking fresh and new, and also make it last longer.
About the Author
Youa is a writer from Minneapolis who loves learning about home improvement and becoming a better handy-man. In her free time, she writes for Fabcon.